Ped editing
Tools: 3D Studio Max 7 & Kam's Scripts
Tutorial author: Vise
Run 3D Studio Max and run DFF IO:

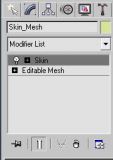
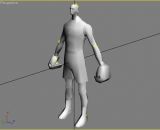
Select A to let the tool make the autoskin of the ped when you will import it. Now click Import and select a dff of a ped extracted from gta3.img. I chose the boxer guy and its dff name is vbmybox.dff. Once you imported the ped press H, select Skin_Mesh and then select Skin the character in DFF IO window. Now you should see something like that:

Cilck the + on Editable Mesh and select a editing method (vertex, edges, polygons, etc). Once you selected one of them a popup alert will be shown, click Yes. In this tutorial I'll click Vertex and I'll move them a bit with moving button (4-arrows button) to deform the ped. Warning: do not add new objects but edit the existing ones or the ped editing will be way more complicated. In this tutorial I increased boxer's hands and reduced its head.

Now you can export it. Open the Export tab on Kam's script, unselect MMC and click Bones/Skin Export. Save it with the original name and import the dff again into gta3.img.

Advertisements
 Login
Login Register


